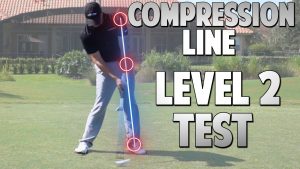
In this video we will test your compression line on video and see if you are hitting the key checkpoints. For level two I give you several checkpoints to be sure to do correctly. Keep up the hard work on the reps!
What's Covered: In this video we will test your compression line on video and see if you are hitting the key checkpoints. For level two I give you several checkpoints to be sure to do correctly. Keep up the hard work on the reps!
Golf Pros Featured:
Instructors Featured: Clay Ballard
Video Duration: 7:58
Watch This Video Now!
Normally, this video in our step-by-step, course-based training is only available to our All Access Members...
But I'll let you watch this ONE video today only... because I can already tell I'm going to like you !

Video Transcription:
Hi guys, and welcome back to the Level 2 compression line test. Now in this one, we’re going to build on what we did with Level 1, which is mostly slow motion drills and then practice swings.
We’re going to actually start to hit some golf balls in this one to really ingrain that. Again, we’re going to do 3,000 repetitions, which is a lot of reps. But don’t try to cram that all into a few days, it takes several weeks to a month to really ingrain this muscle memory and to get comfortable with this type of motion.
Eventually what we’re trying to do is get this so ingrained that we don’t even have to think about it, we just stand up, we take a swing, and it automatically happens. The only way to get there is to be able to get enough reps in to build that muscle memory to where it’s fully ingrained.
So let’s go ahead and set up the ball here, and let’s recap onto the things that we worked on in Level 1 that we’re going to continue to work on in Level 2.
The first thing I’m going to do, I’m going to grab my camera, set it up from face on. I need a program where I can draw a line on there, I typically use Hudl Technique, it’s a free app, that’s H-U-D-L Technique.
Then as I’m coming into contact, I’m going to go ahead and pause just like I’m making a full swing. I’m going to check the center of my left ankle, the center of my left hip socket itself, and the center of my left shoulder socket.
Those should all three be in a straight line. If I drew a line from the center of my ankle to the center of my shoulder, the hip socket’s going to be right in the middle of that, and those should all three be tilted away.
A good angle to look for is about 6 to 8° tilted away from the target, and that’s with basically any club in your bag. Shorter irons could be a little bit less, driver could be a little bit more, it doesn’t have to be exactly one number. It’s just in that range is going to put you in a good spot.
The biggest thing is to make sure those are in a straight line, and then my hip isn’t bumped up or bumped back this way. Now in this section we’re going to add a little bit more to this, get a little bit more in detail.
I want you are your making practice swing, I’d recommend starting out with some practice swings. As you pause, or as you pause the video as you do your practice swing, I want your left leg to be mostly straight.
So you can see here would be a bit less leg, this would be a dead-straight, locked left leg. I want to have a little bit of flex left in my left leg. That way as I’m coming through, as I get to my straight line release, that’s where I’m really going to feel the left leg completely straightening up.
So my left leg will be straightening as I’m coming through contact, I don’t want it to already be locked as I’m at contact. It’s going to be a little bit bent as I’m coming through there.
So check those positions. Left ankle, left hip, left shoulder, all three in a straight line, all tilted about 6 or 8° away from the target, and that left leg slightly bent. Get in a lot of those reps, build that muscle memory.
You’re going to thank yourself for the rest of your life, because this is going to be natural, and you’re going to be in the perfect position to deliver the club to the ball every time.
Good luck to you guys, and I’ll see you all soon.

