
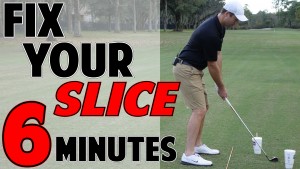
Why You Need This: In this video, you’ll learn how to fix your slice in 6 minutes.
So, does this sound familiar?
You confidently stepped up to the ball, took your shot, and watched with disbelief as it sliced into the trees?
Your round just went from decent to horrible with that one shot.
No matter what you do, every now and then, that nasty slice creeps back into your life and makes your blood boil.
Well, today’s video is for you.
I’ll walk you step-by-step through a simple drill that’ll fix your slice.
You’ll nail your grip, your setup, your alignment, and your swing path.
And we look far and wide for a state of the art training aid...
OK...just joking about that.
There’s no need to shell out a hundred bucks for this drill.
Just grab a few cups from a fast food joint and an alignment stick.
About the drill:
First, let’s work on your grip.
You’ll discover how to grip the club so the clubface is naturally on target.
The second piece of the drill addresses your alignment.
This may sound a bit weird…
But I want you to close your stance a bit and set up a few cups in a way that it creates a channel for your club to swing through.
Essentially, you’ll be forced to swing on an in-to-out path.
In the final piece of the drill, you’ll work on keeping your right elbow down.
This will help you keep your clubface closed through impact.
Putting all these steps together will help you eliminate your out-to-in club path and will help hit with a more closed clubface.
Watch now to fix your slice in 6 minutes!
Golf Pros Featured:
Instructors Featured: Clay Ballard
Video Duration: 6:34
Watch This Video Now!
Normally, this video in our step-by-step, course-based training is only available to our All Access Members...
But I'll let you watch this ONE video today only... because I can already tell I'm going to like you !
Video Transcription:
All right you find yourself up on an important hole, you’re on the tee box, maybe you’re in the fairway. You think you’ve gotten rid of your slice, you’ve been working hard on it, and then that comes out. That ball fades all the way over into the right into the trees or out of bounds, and it costs you big time.
No matter what you try, you’ve tried all the tricks, all the tips, and you haven’t been able to get rid of your slice.
In today’s video, we’re going to attack it from all angles. I’m going to walk you through from start to finish, set up, your grip, your alignment, your swing path, and I’ve got a cool drill with some cups here, it’s going to help you to get rid of that slice.
The very first thing we want to work on is our grip. So a lot of times what’s happening, if we can imagine this is a straight up and down, square club face. You can see the leading age and my face is vertical like this.
If I lay that on the ground, I have this alignment rod kind of going to my target, we’ll get to that here in a second. What a lot of times what I’ll see, is people get their hands too far this way to the left.
If you can imagine your fingers are underneath the club like this, a lot of times what people will do is they’ll turn their hand this way until their fingers are almost on the right side of the club and their hands are shifted way over to the left.
This is exaggeration so you can see what I’m talking about here, but when I relax my hands, notice how now the face is wide open. So the more I get tilted this way, the more that I’m going to tend to open up that face.
We’ve got to make sure we get our grip correct first. The very first thing we’re going to do here, is I want to have this square club face, and I want to feel like if I had my hands open under the club, I’m going to let my fingertips go more underneath the club, go more this way so my fingers are more on the left side of this club.
If I do this, you’ll see that when I rotate my right hand under – let’s actually go this way – watch my shoulders as I’m too far to the left.
Watch what happens when I rotate my right hand more under the club, and now my shoulders are going to go more to the right like you would see with somebody that hits a draw.
So this is hands too far to the left, and then watch as I roll my hands more over to the right. Now you can see I’m in a better position.
If I’m checking this, another way to check this you’ve probably heard before, if my hands are more under this way or turned more to the right more over this way, now my V between my thumb and my forefinger is going to be up toward my right shoulder on both hands.
Now you can see those Vs in my fingers, they’re up toward my right shoulder. That’s going to be crucial, that allows you as you’re coming through to rotate the face on closed which we’ll get to here in just a second.
Second piece here is alignment. So I have this going to my target out in the distance. If I’m hitting a fade, a lot of times what I’m tending to do is I’m opening up my stance. That way when I come over top of the ball, it starts out to the left and then fades back into the middle of the fairway.
If I’m doing that, I’ll tend to go farther and farther left. So before long, I’ll set up, I’ll think I’m dead straight to the target, and then I’ll be over here to the left like this, where I’m going to have to play a slice or my ball’s going to be out of bounds left.
That further ingrains hitting more and more of a fade, more and more of a slice.
I want you to line up a little bit to the right. So we’re going to set up here, and all I’m going to imagine that I’m doing, is going ahead and turning my body a little more to the right.
I’m going to go about 5 or 10 yards to the right of my target line here. Now you’re going to see my feet, my knees, my shoulders, everything is more to the right. I don’t want to line up my feet to the right, and then go ahead and get my body back to the left. I’ve got to get my body to the right, also.
After we get our set up right, and our grip right, now this is where this cool cup drill comes in. Really, really easy.
So I’m setting one cup outside of my ball, so you can imagine a straight line going to my target. One cup’s outside of that, the cup in front is inside of that. So now it’s giving me this path to swing a little bit more out to the right.
As I’m setting up to this ball, now it feels much more comfortable for me to swing out that direction because I almost have an alley that I can go through.
Finally, I want you to worry, or I want you to work on getting this right arm a little bit more under, which is going to help this too.
Here my forearms are kind of flat and level on each other. You can see how as I set up to this ball, my forearms are basically level. This is going to be for kind of a straighter alignment.
I want my right forearm to be a little bit more under, again if you have that grip more under, this is going to be a lot easier.
Now look at how my right elbow and my right forearm is underneath my left forearm and my left elbow. So you can see how my right elbow’s a little bit lower, I’m going to exaggerate here for a second, that would be very exaggerated.
I just want a little tiny bit of that. Again, that’s going to help me with my path going out to the right.
Now as I finally put all these pieces together, I’m going to rotate my face and feel like it’s closing and hitting the outside of the ball.
If we split a line in this golf ball, if this was the inside of the golf ball, this is the outside of the golf ball, as I swing to the right, I’m going to have my face closed so I’m actually hitting the outside or this side of the golf ball with the face.
So the face is going a little bit that way. It’s that difference in the path right, face left, which allows you to get that ball to turn over from right to left.
Let’s put all these pieces together. I’ve got my grip, getting my hands more under, hands a little bit to the right there. I’ve got my set up, I’m a little bit to the right, 5 or 10 yards. Now I’m going to start to the right and get it to draw back in to the center of the fairway.
Got my alignment, my knees, my hips, my shoulders. I’m going to have my right forearm a little bit more under. As I swing, I’m going to be swinging out to the right and letting that face roll on over. As I put all these together, I’m going to have a beautiful draw.
There we go, that ball started off right down the right edge of the fairway, and drew back in right to the dead center of the fairway. So it drew about 15 yards.
Again, I’m exaggerating that. Try this drill out, see if you can get that ball to hook 30-40 yards in the beginning, and then gradually start to tone that down so it goes straighter and straighter.
It’s going to be a great video for you. Make sure that you get at least 100 reps in on each of these pieces. Most likely what’s happening, if you’re struggling with hitting that slice still, is you may have one these pieces right but there’s still other ones that are falling apart.
Once we get this entire picture like this, now we’re going to be able to hit some really good shots and get that draw time and time again.
Work hard guys, go through this drill 100 repetitions, and you guys are going to get rid of that slice and get that fade really working your next time out. Good luck, and I’ll see you all soon.
